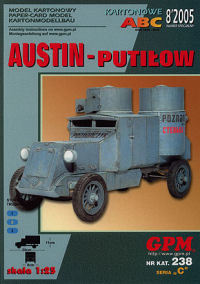
Austin Putilow 1:25 GPM
The Austin Putilow is an Russian armoured car from WWI.It looks kind of strange,but it grows to be looking really nice as the build
goes on.The weathering on this model is very very nice,and all parts have 100% fit.
Some of the parts and drawings
The tires
The tires on this one was looking kind of difficult at first,since I had to make spokes of paper....but when I had done some thinking things got nicely in place.
| Drawing for the wheels |
Parts to be used for the wheels |
Made a jig to keep it in place |
First step is to cut out the ring that will be on the inner side of the tire.
Ring is glued to 0,5mm karton and cutted with the Olfa circle cutter. |
| The ring is glued in place and the two tiresides are ready to be cutted out. |
The two coned parts are cutted and rolled to the right shape |
The parts are glued in place |
The top piece are cutted out and will be glued on top |
| The top ring in place |
And I used some grinding paper to break the edges.The tire is now ready for the other side, the tire pattern and the paintbox |
The tire is done... |
Next is to put on some paint and dust....
The tiresides was also a new way for me to do wheels.
As we can see from the drawings the sides are built up of 3 parts.They are buttglued to each other.Two are coned and the outer lies level on top. |
| The top layer are built up of tiny pieces. |
Still some left to put on but you get the picture of how it's done. |
The first tire is done... |
The tires mounted on the axel |
The frame,springs and other details
| A top down view to the leafspring and rear axel. |
View from underneath,where we can see how the springs are attached to the axel.Some picky work,but it turned out pretty well |
A closeup of one of the rear tires |
Closeup of the leafspring and the connections |
| The engine with the manifold and the hose to the radiator |
The exhaust tank |
A closeup of the radiator |
Closeup of the radiator |
The front suspension and the brake system
| The two front leafsprings weathered and put into place |
The rear brakesystem |
An overview of the finished frame with details |
Closeup of the front leafsprings |
| Both sides of the braking system is done |
The rear towhooks |
An Euro shot... |
Closeup of the front wheels and springs |
Some shots of the finished frame
| A sideview of the finished frame |
Seen from underneath |
An overview of the finished frame with details |
Closeup of the front part with the steering |
The gun turrets and the rear hull
| The machineguns |
Another view of the gun |
The gun turret |
A peek inside |
| The opening for the gun |
The gun and the support for it are in place |
Front view |
Another peek inside |
| The two turrets are done |
The hull is also mostly done.The build of the hull is mostly straight forward building.Parts fit 100% and it's
quite easy to get the right shape of the roof and the turret holes. |
Side view |
Top down view |
| The turrets in place |
Another view of the turrets and hull |
The inside is slowly getting there... |
The hull loosely put on top of the frame |
The front end.
| Left side |
Front view |
Right side |
A closeup of the right side |
| The front end dryfitted on the frame |
The rear and front are glued together |
Making the last adjustments |
The boss is keeping an eye on the guys |
| Adding details |
Turret inspection |
Mounting the headlight |
Model is finished!! |
This was a very fun build! All parts fitted 100% The model has a vey nice weathering and even in it's uglyness it looks very good!!
Pics of the finished model is Here


