Horch 1A 1:25 ,Modelik
Construction report
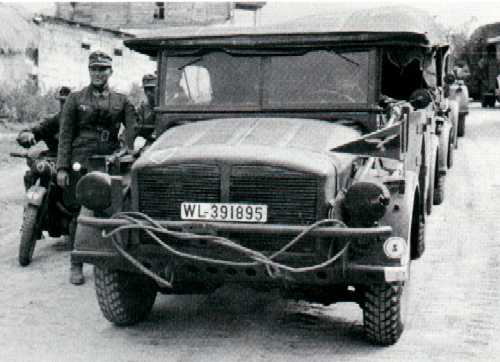
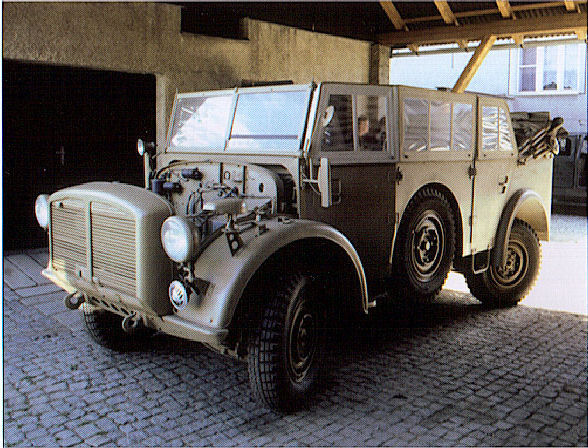
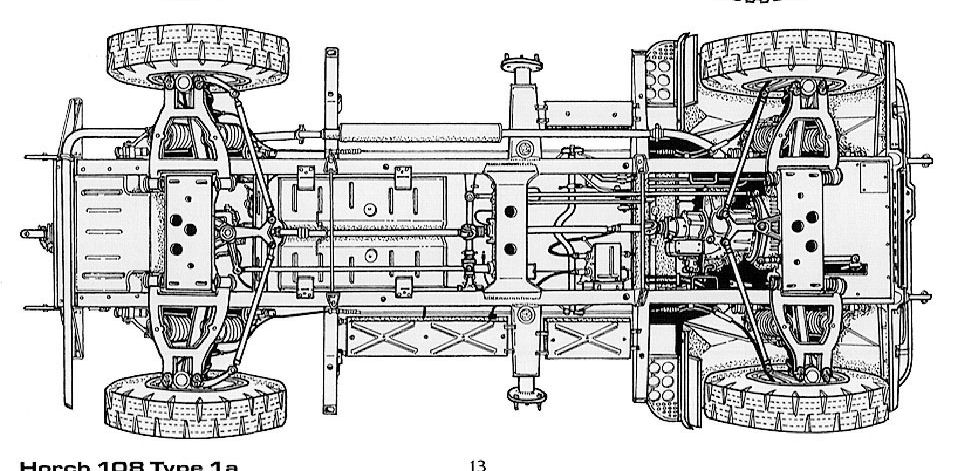
The Auto Union/Horch 108 was classed as a universal heavy cross-country car (schwere gelðnddegðngige Einheitspersonenkraftwagen)
and was quite often found performing in both the Kfz 15 (field car) and Kfz 70 (troop carrier) roles.
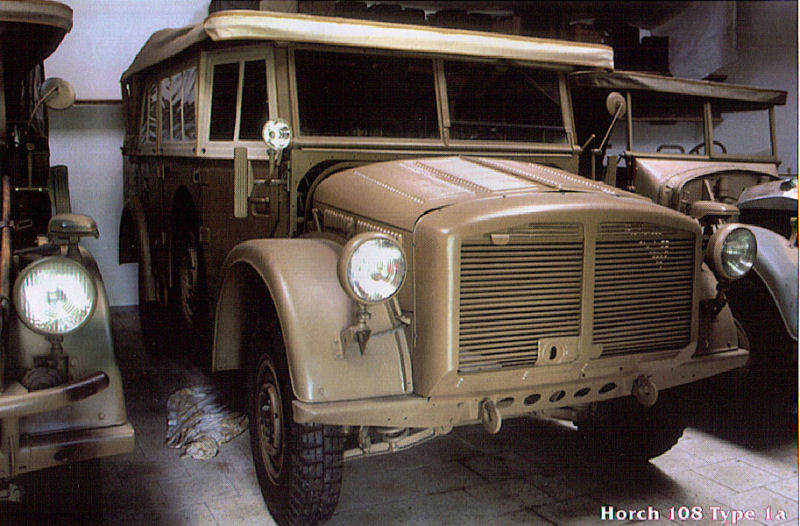
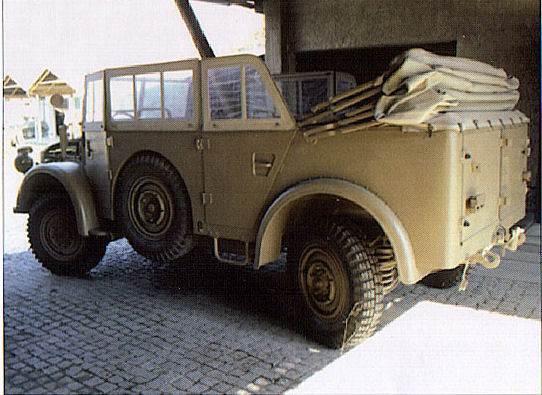
It appeared in two main variations; the first model was the 108 1a (the Battlefront Model) with all wheel steering and external spare,
the late version, the type 40, had internal spare wheels and only front wheel steering.As a cross-country car it is four-wheel-drive.
As well as Auto Union/Horch 3.8 litre V8, it was also made by Ford K—ln who built it using their own 3.8 litre V8 engine.
A number of Horchs were converted to mount the 2cm FlaK38 gun on their rear compartment.
A total of 8135 Horch 108s were built between 1937 and 1945.
The model from Modelik is rated as a medium difficult model.The instructions are only in Polish,but the drawn instructions are quite easy to follow.
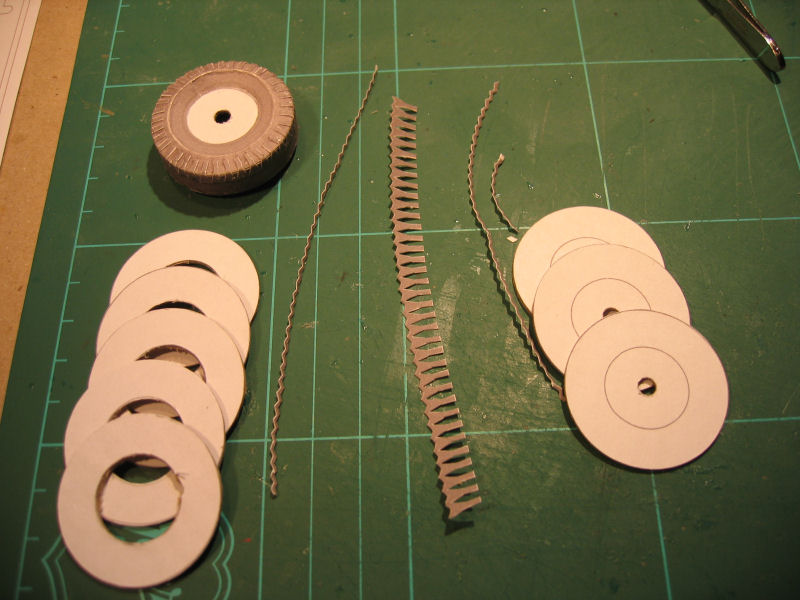
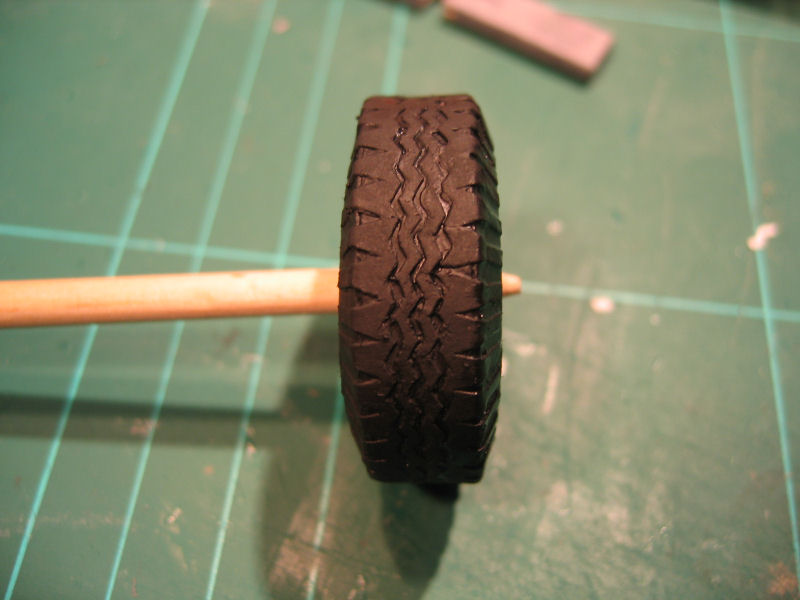
As I often do....I started with the wheels
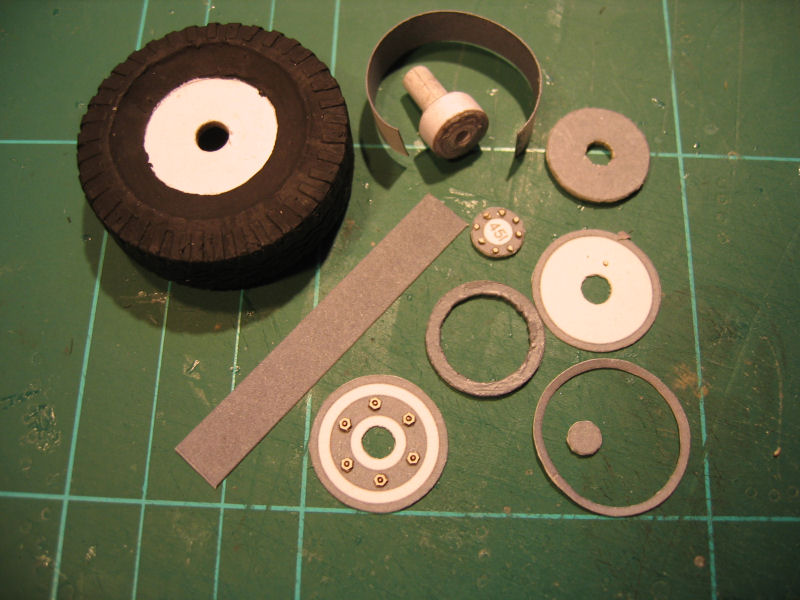
| Here I have prepared the parts for one wheel.On this build I wanted to enhance the wheels a bit,so I decided to make a pattern in the tyres.So the paperstrip for the wheel was divided into four parts. |
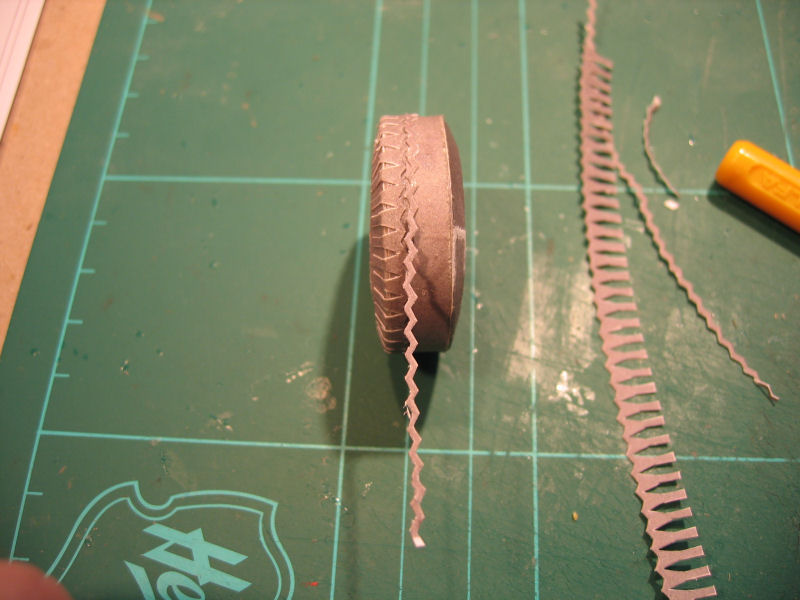
Here is the first outer part glued over the tyre edge and the second strip is on it's way to be glued all the way around |
Second strip almost done |
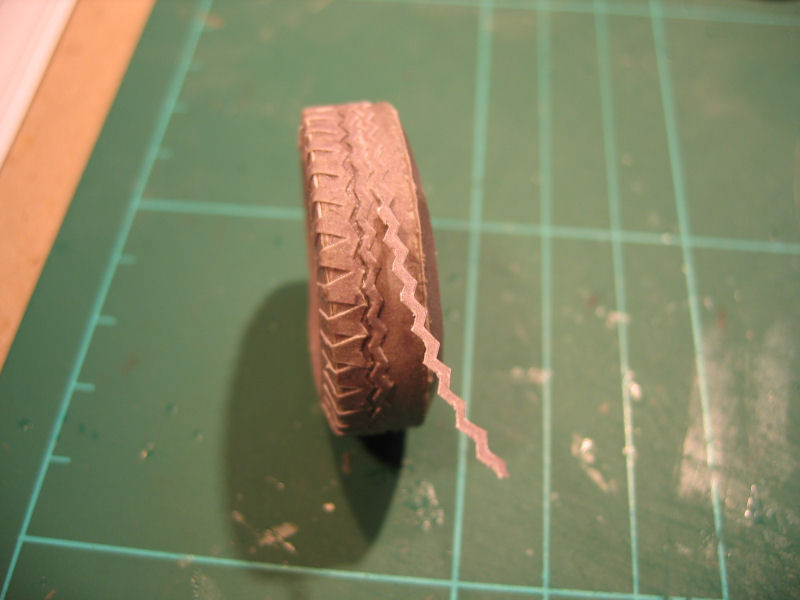
And the other outer part.The flips are to be bent down the tyreside and glued. |
| And the tyre is ready for the next operation |
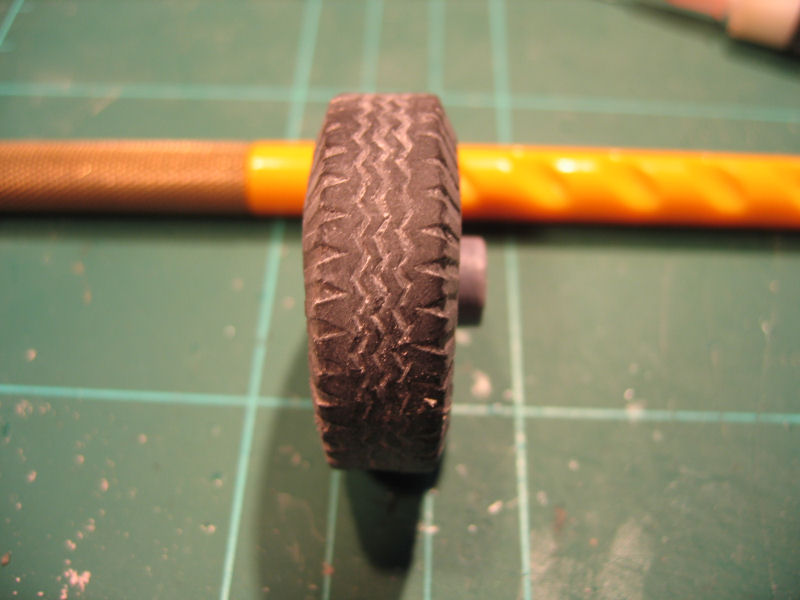
Painted black |
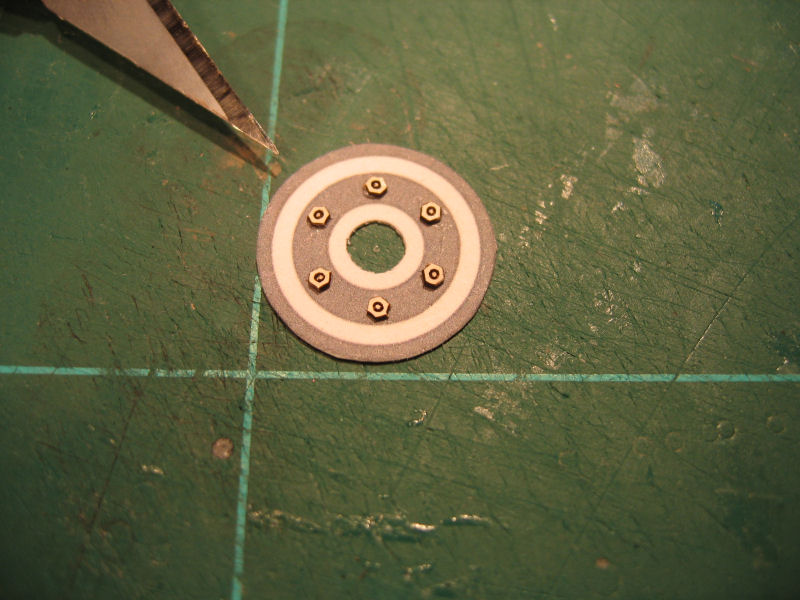
Next was to build the rest of the inside and the ouside rim.As we can see from the drawing it contains some parts.. |
First I prepared the inner part of the rim with some 1mm nuts |
| The parts for the rim |
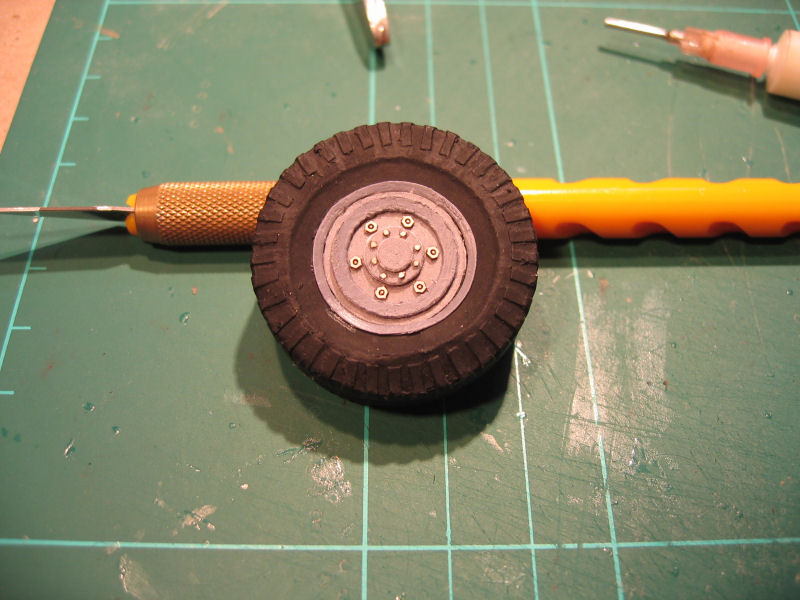
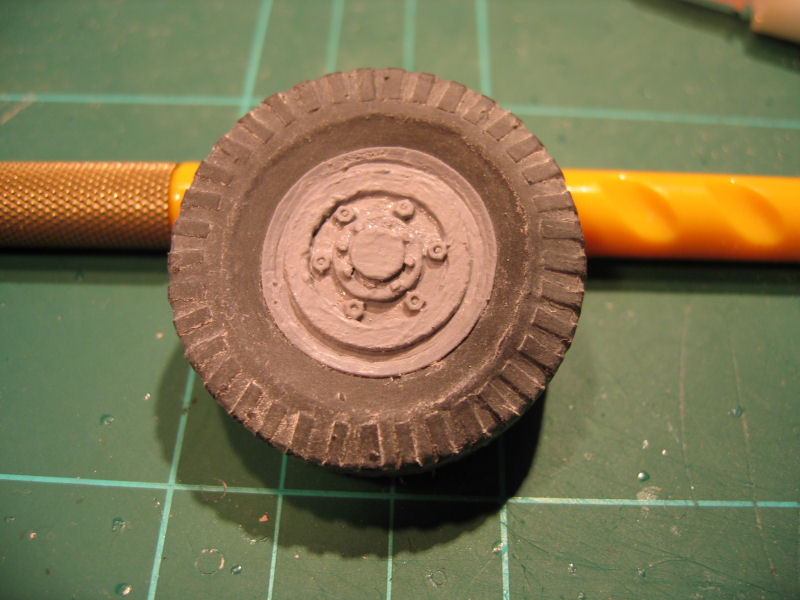
The wheel is done |
Painted and chalkdusted |
Tyrepattern came out quite nicely |
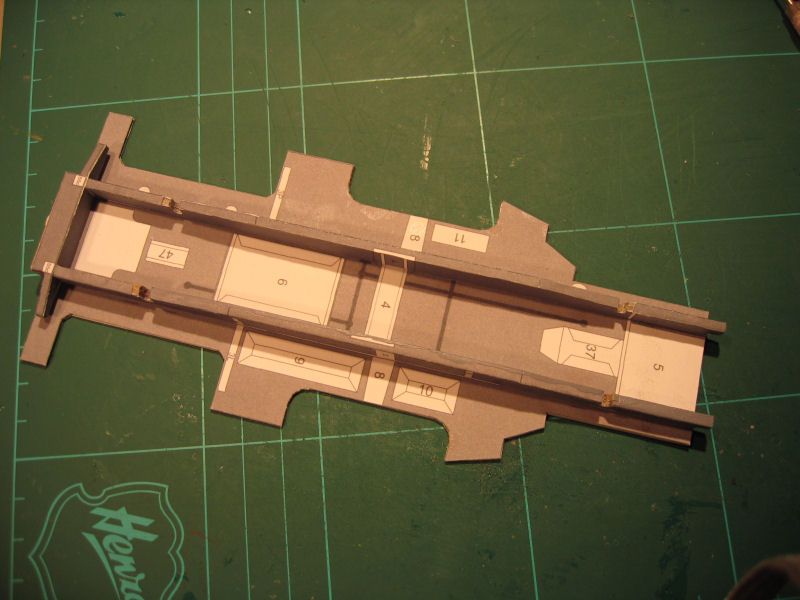
I continued with the frame and the different parts belonging to the underside of the construction.
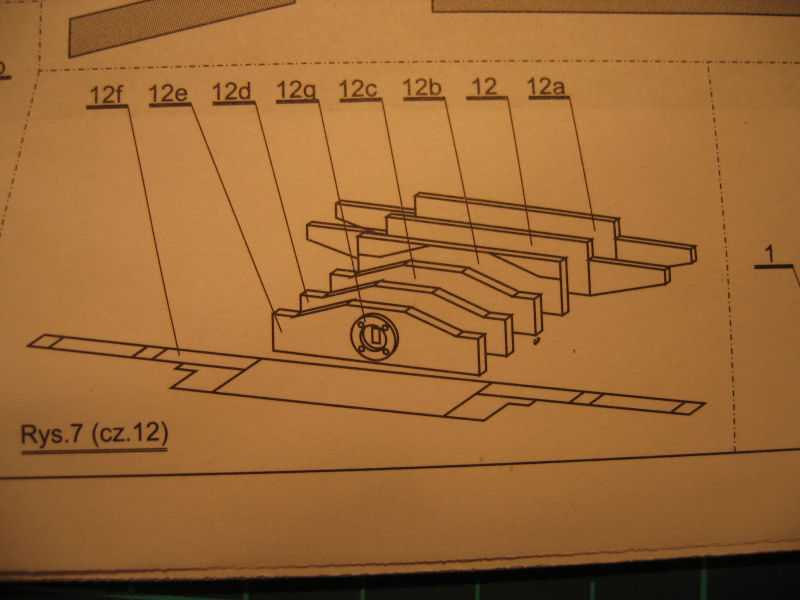
| Part nr 12 belongs to the rear end of the frame,and it's the part that will hold the hook in the end.The drawing of the part |
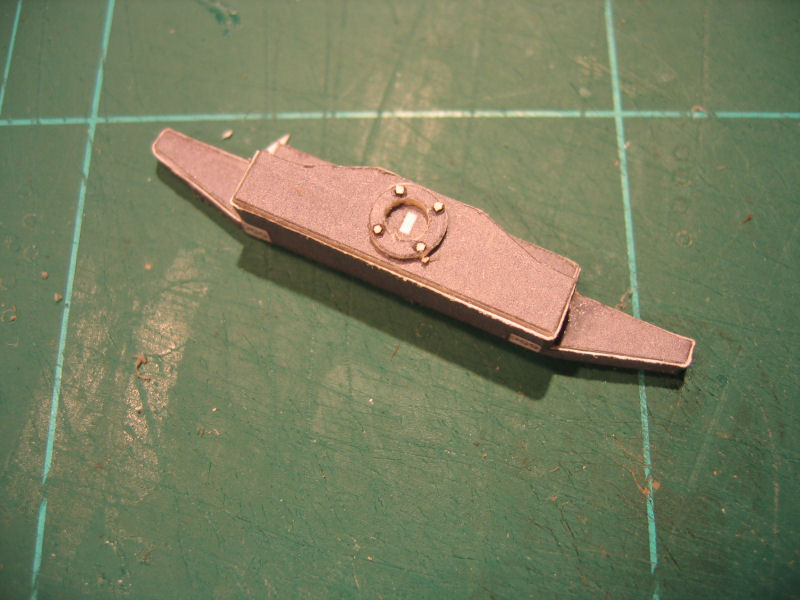
Parts cutted out and are ready for assembly.The parts is glued to 1mm karton exept for 12g and 12d that are glued to 0,5mm |
Finished and covered by part 12f.The part is not painted yet because I'm not sure what colour to put on the underside of the vehicle. |
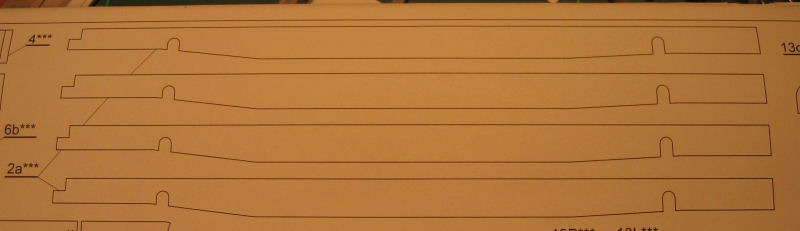
The frame.
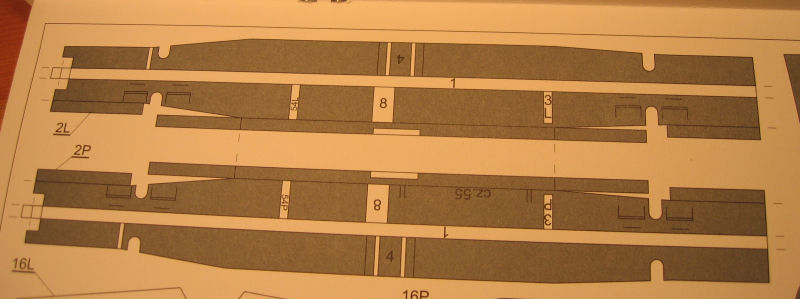
The frame is built up of the parts 2a which is glued to 1mm karton and laminated into 2mm.The pieces are then covered with part 2p and 2l |
| The skin for the frame |
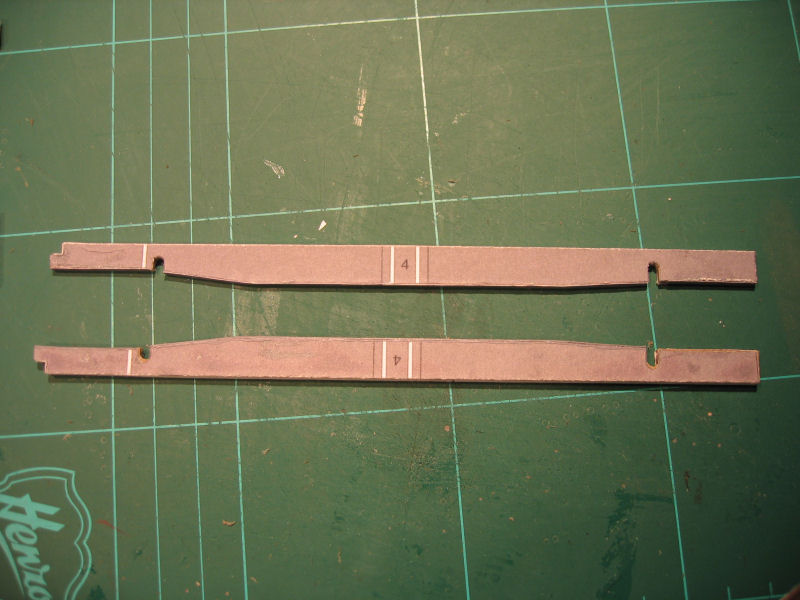
The finished frames |
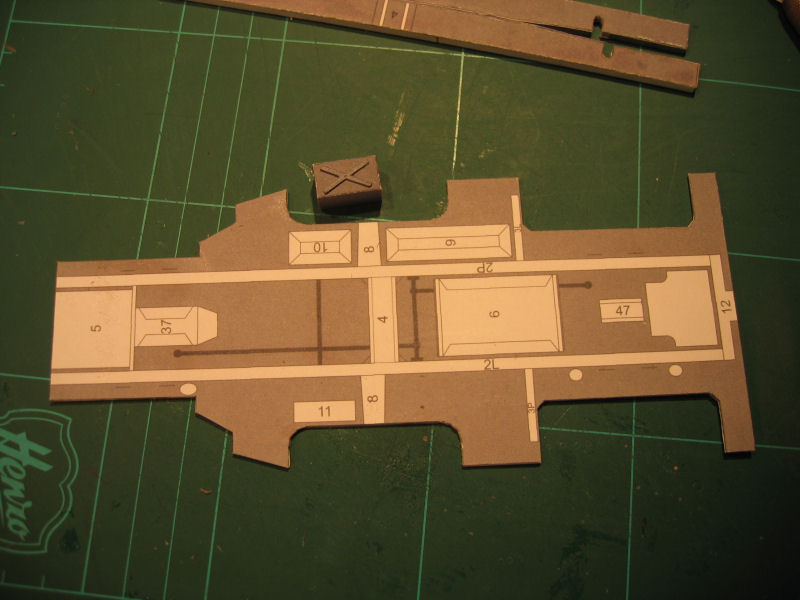
Here we have the underside glued to 1mm karton |
And the parts 2l,2p and 12 glued into place |
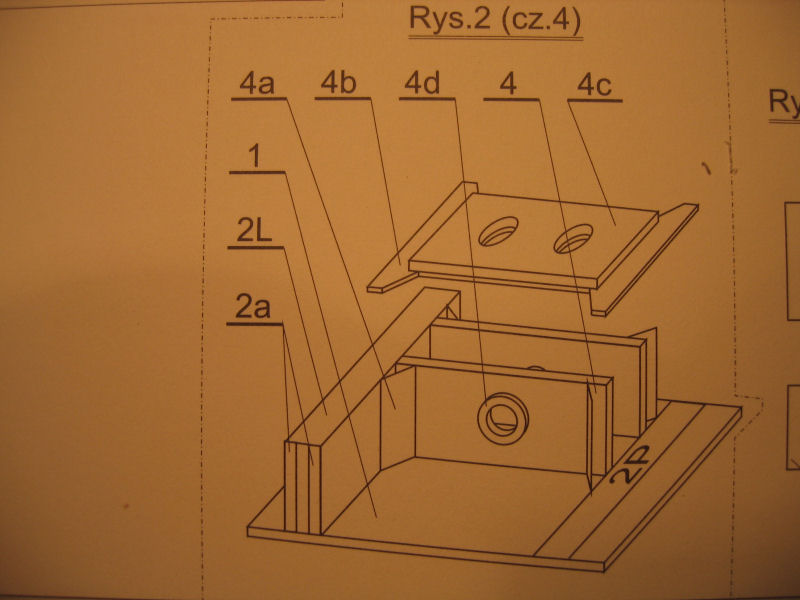
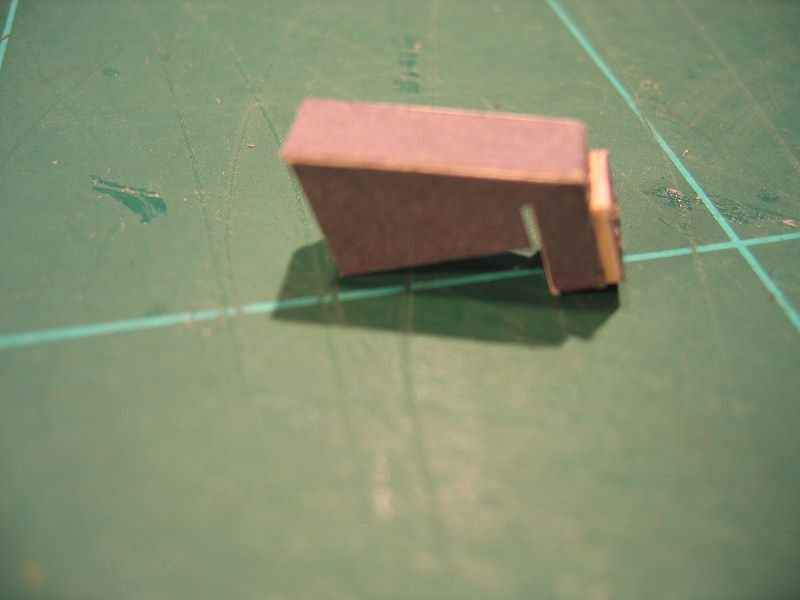
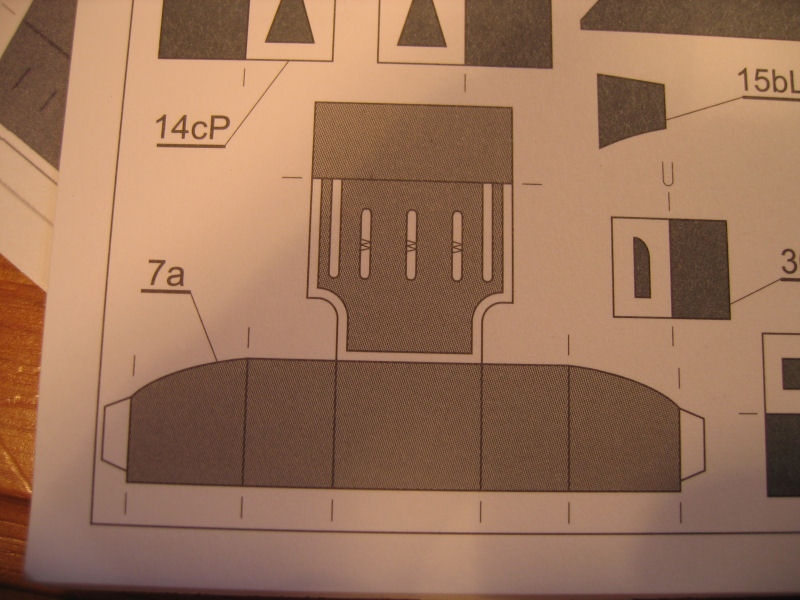
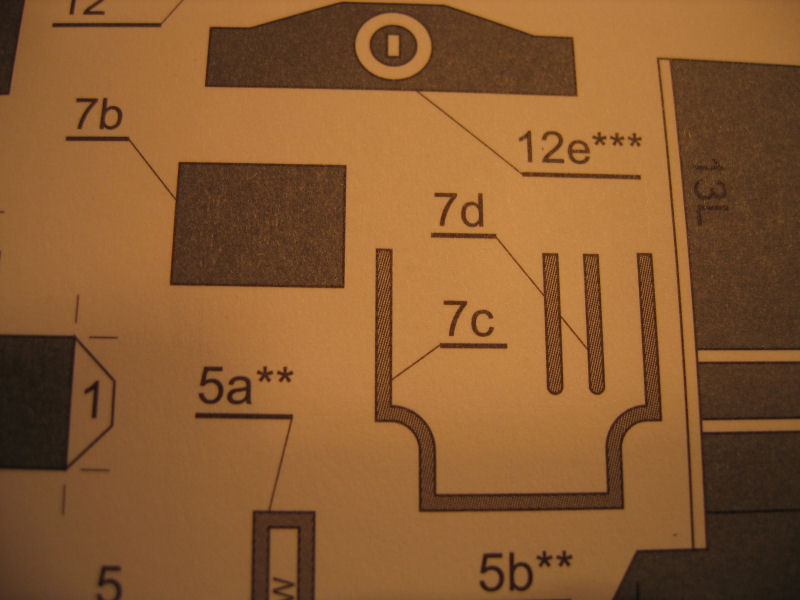
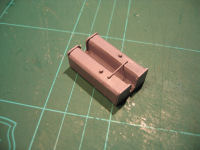
| Next part is a box of some kind....
The drawing |
And here we can see it in the center of the pic.It looks to me as it has something to do with the 4 wheel steering and the transmission to the front and rear axel. |
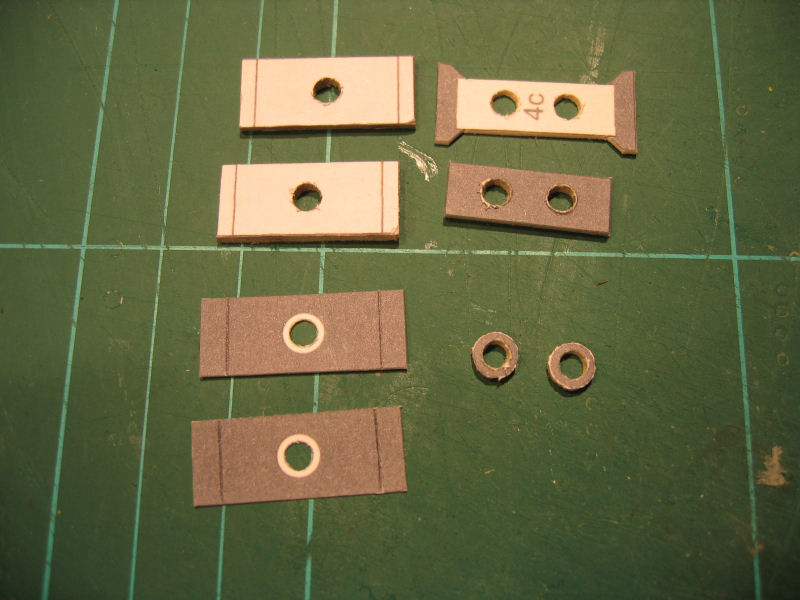
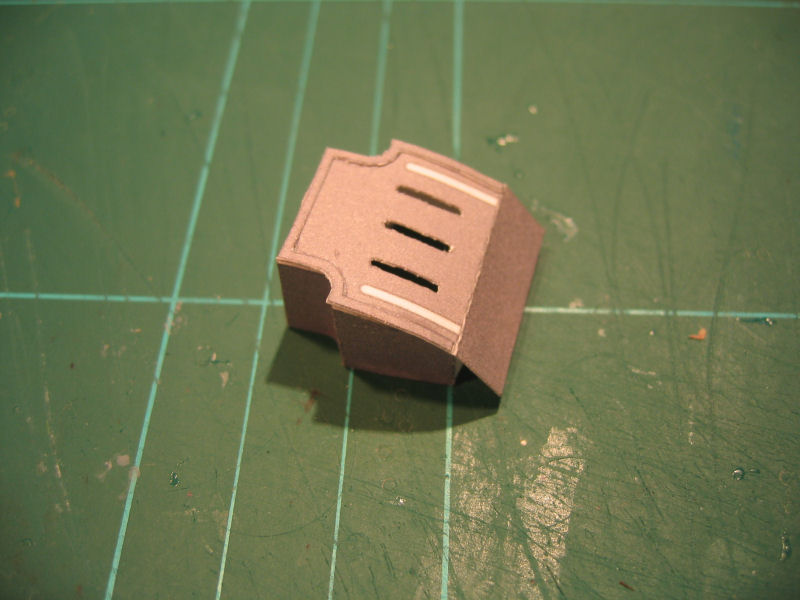
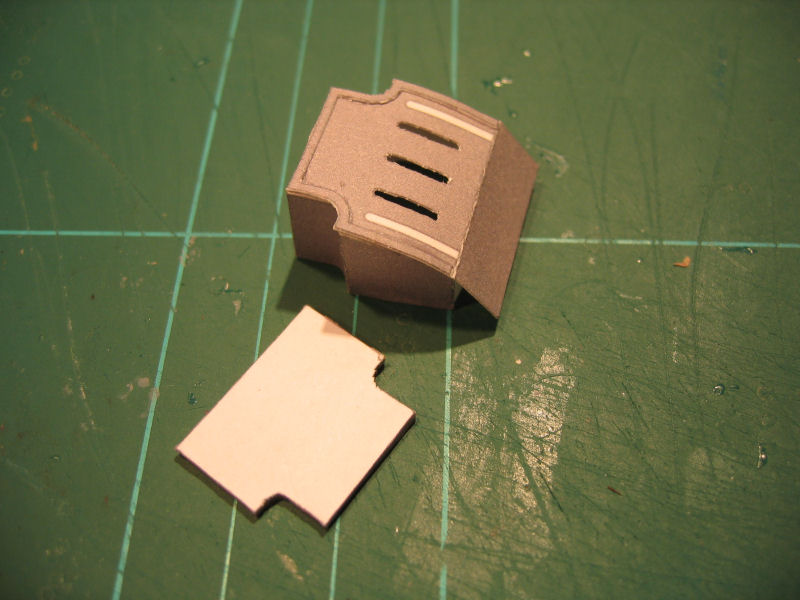
Parts cutted out and glued to the different sizes of karton .4c,4d and 4 is glued to 1mm,4b to 0,5mm and 4a is the front and back cover. |
The part is assembled and glued into the right place. |
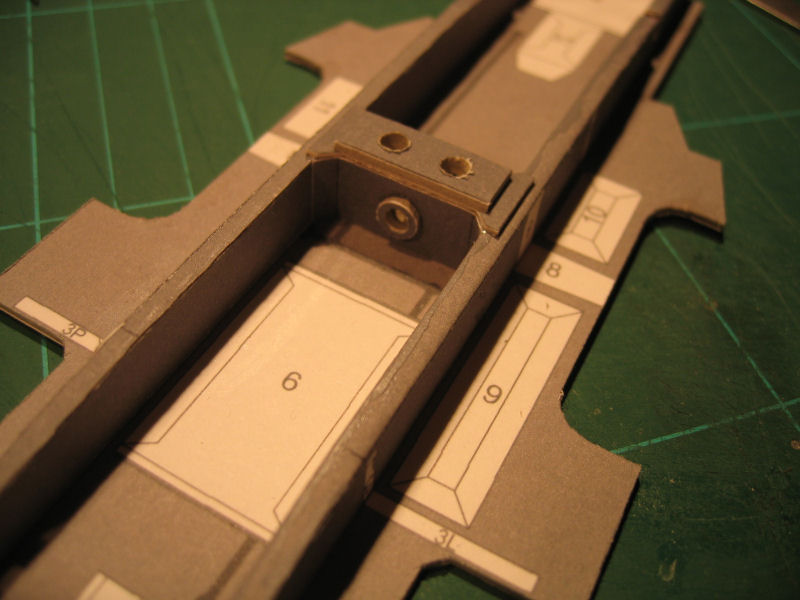
| Part 3 contains 6 parts.The parts 3L and 3P, 3al and 3ap are glued to 1mm karton |
They are glued together 3L+3al and 3P+3ap and covered on top with the part 3b |
Making of the holder for the right spare tire.
| The part is combined of the part 8 and 19. |
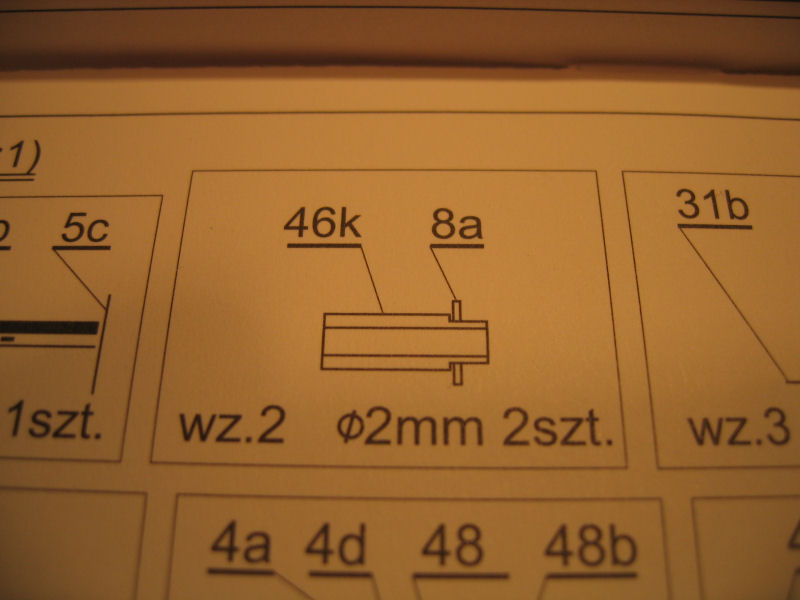
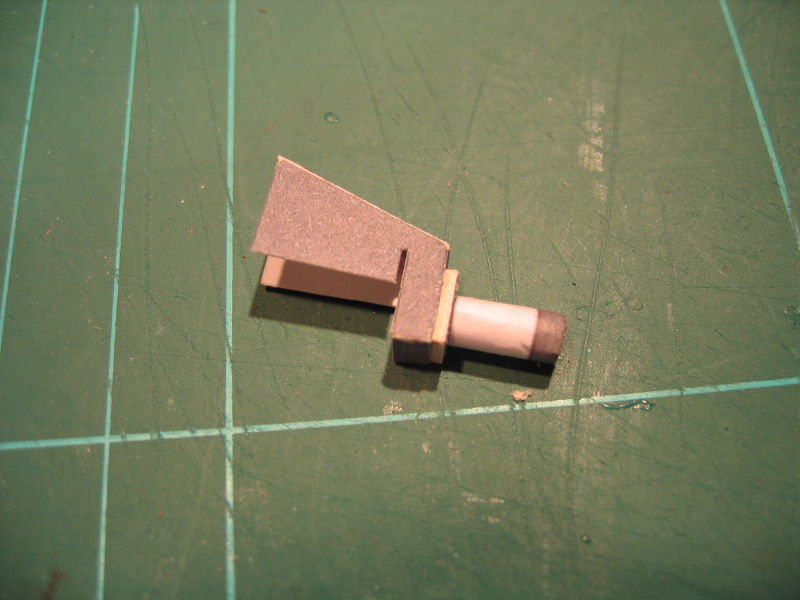
I'm starting to build part8. |
There was no drawing for this part.It was self explaining |
The axel is supposed to be rolled against a 2mm rod |
| The axel inserted into the part. |
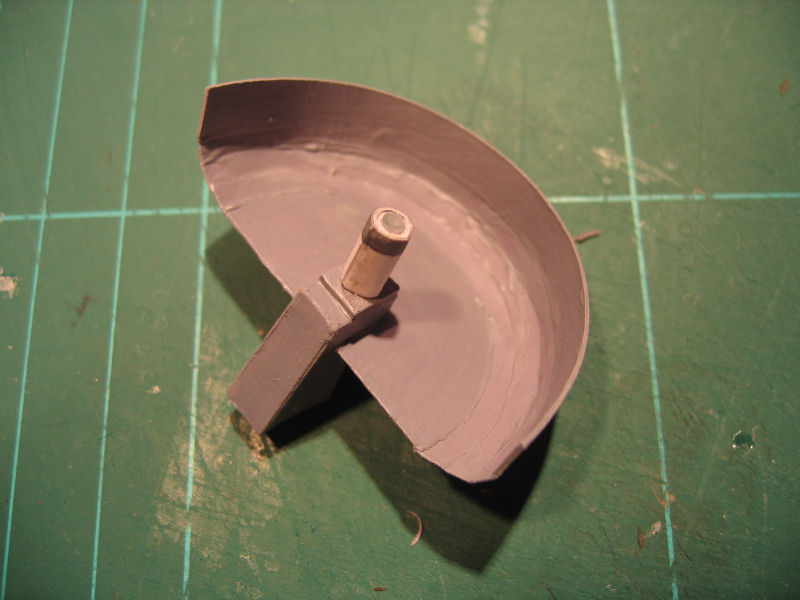
Part 39 contains the most tricky part here.Several strips is to be mounted together to mahe the surrounding for the tire. |
With some patiente....a little glue and it's done |
Assembled together with part 8 it looks like this. |
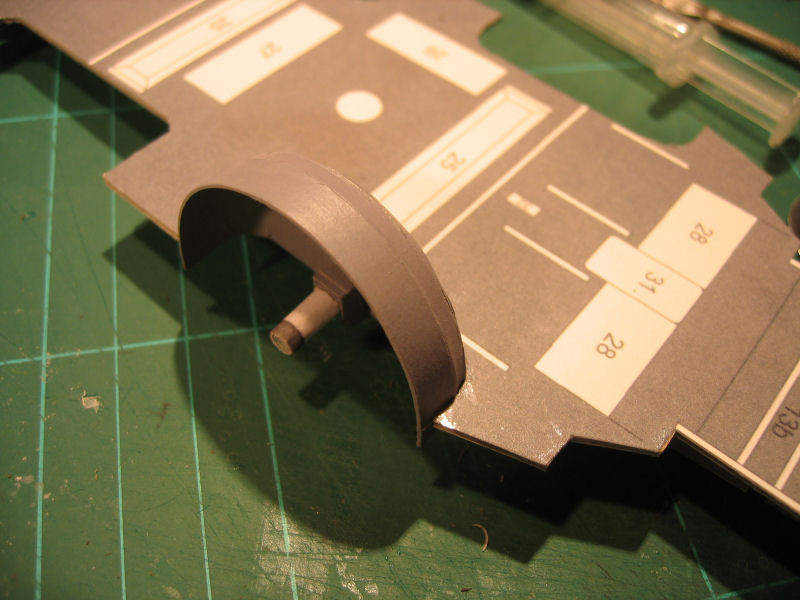
| Placed on the frame. |
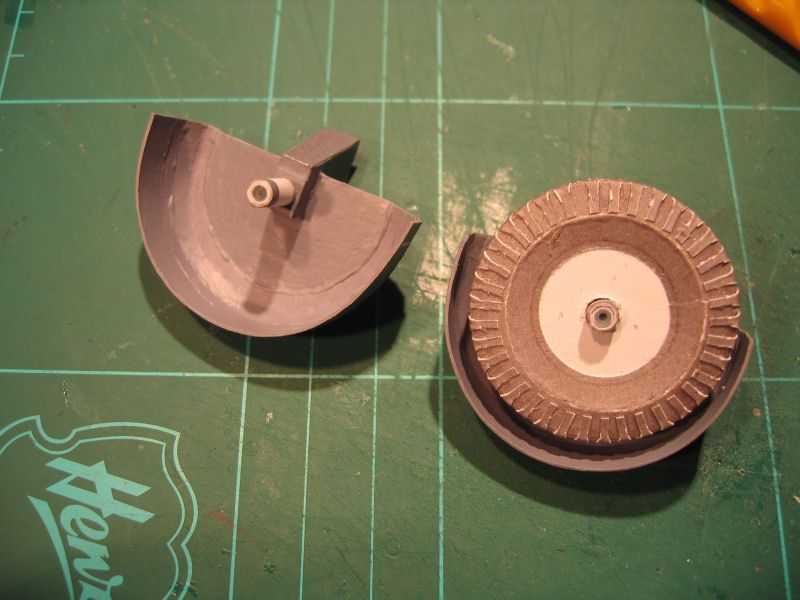
Wheel inserted. |
Another view |
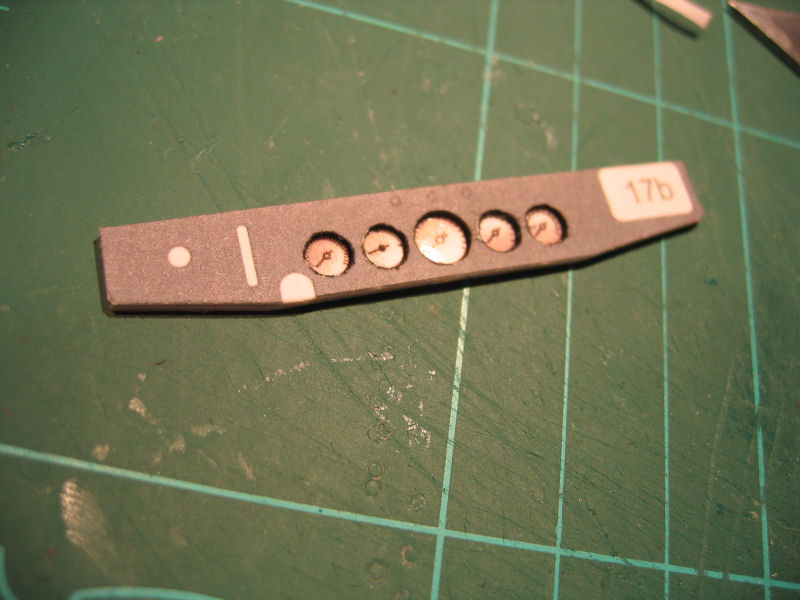
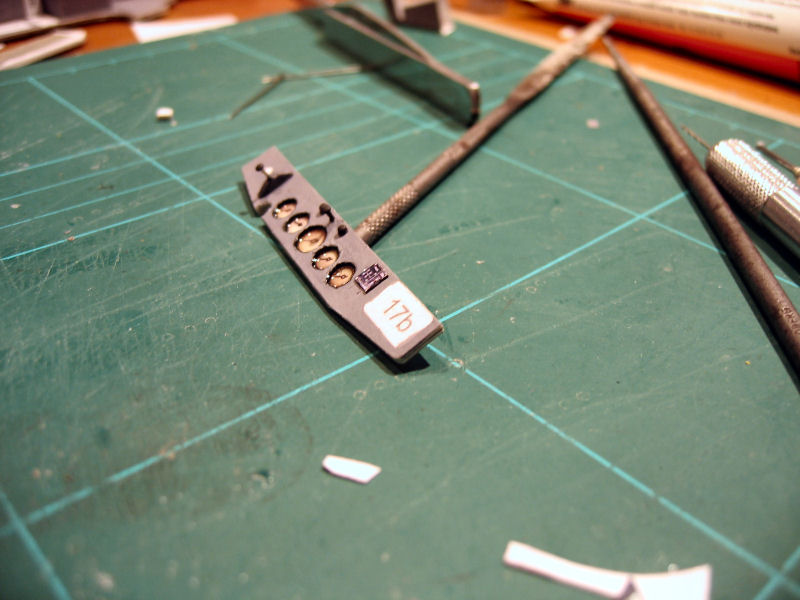
The instrumentpanel
I thought I wanted to have the instruments look more real, with some more depth in them.So I did a second print of the instruments on high gloss photopaper and glued it to 0,2mm karton.
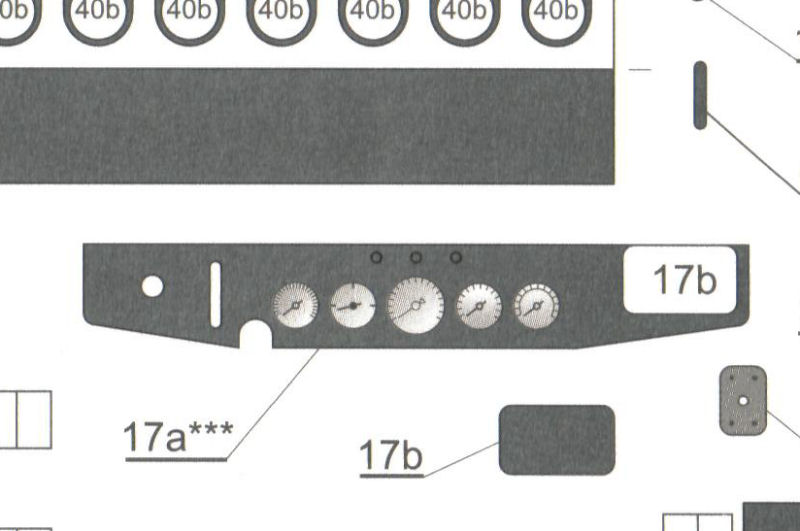
I also glued the original panel to 0,5mm karton and cutted out the instruments and laminated theese two pieces together to be 1mm as it should be according to the drawings.
| I also painted the inside of the holes black.. |
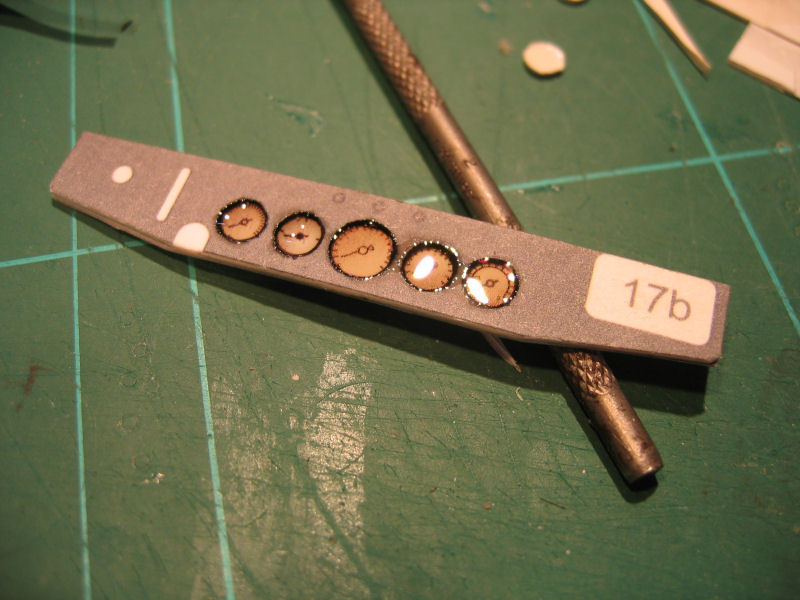
And to simulate glassfronts on the instruments I dropped some gloss varnish into the holes.The instrument board still have to be painted and getting the respective knobs. |
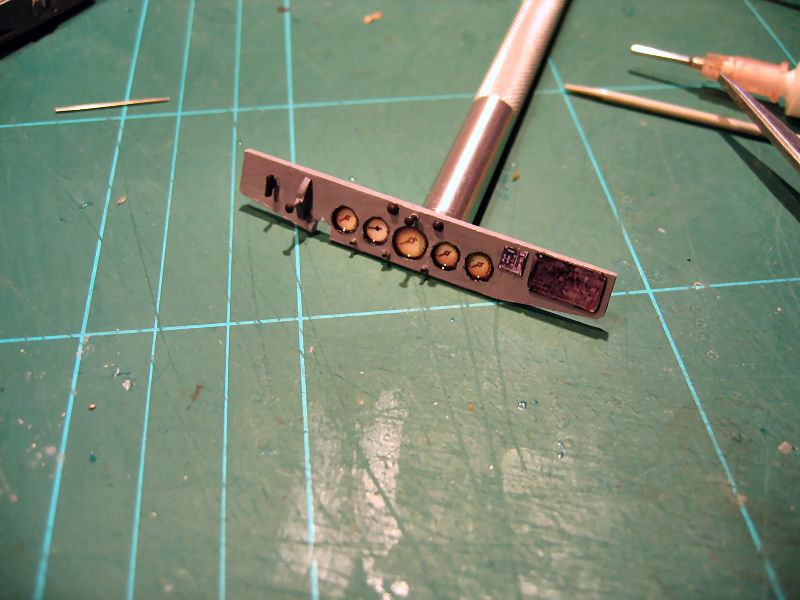
This is not perfect....but it sure looks better than this |
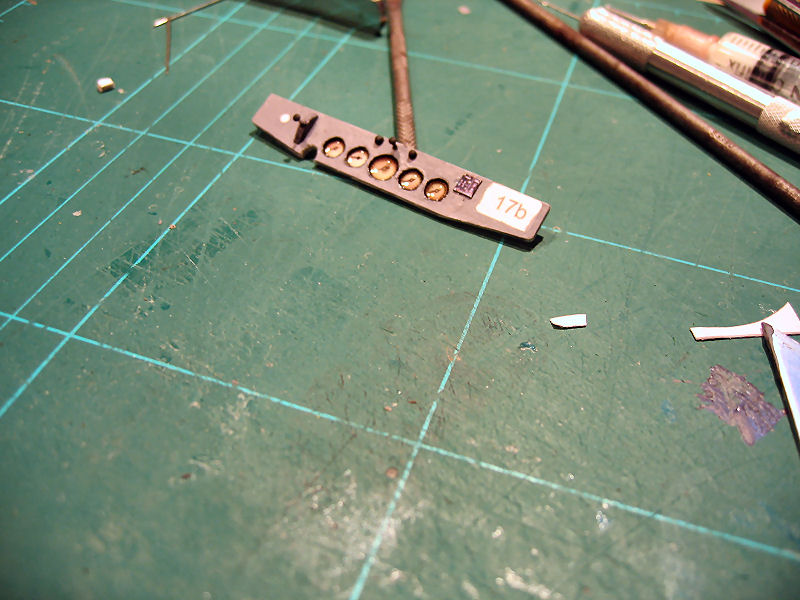
I have added some knobs and a lever to the left and one of the signs to the right |
| Panel also painted. |
Still some knobs to make according to real photos. |
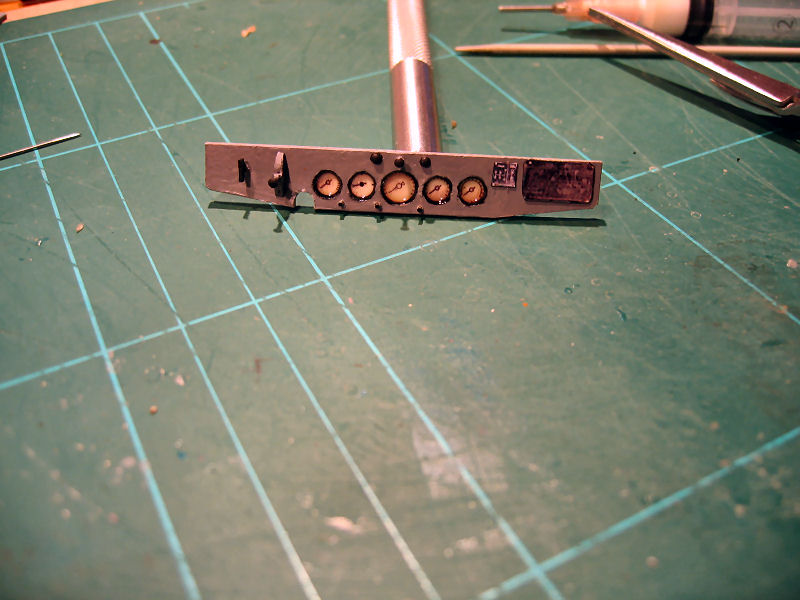
Instrumentpanel done.According to real photos it's pretty close. |
Another view. |
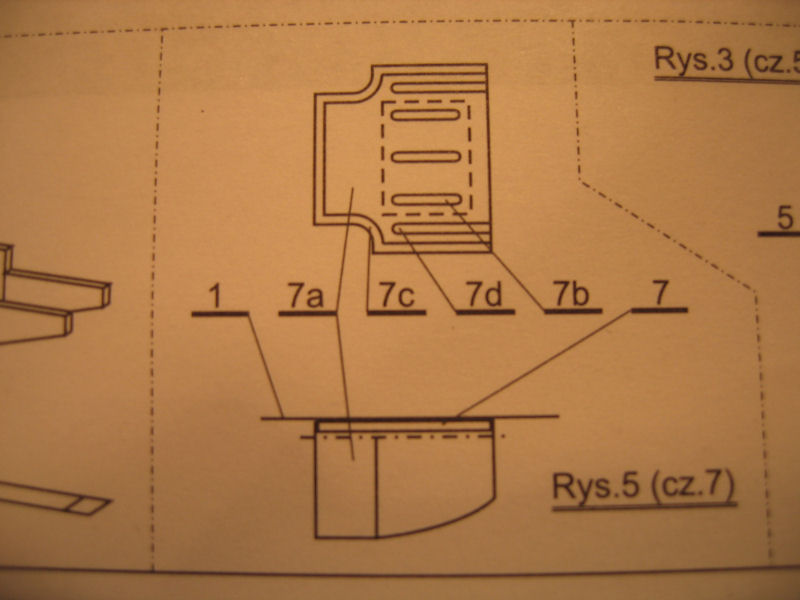
Continuing on the underside of the car.
The fueltank
| Drawing of the next part. |
Parts. |
Parts |
This part will be glued to 1mm cardboard |
| The main part is glued together. |
And the bottom on 1mm karton waits to get in. |
The part is assembled |
And put in place |
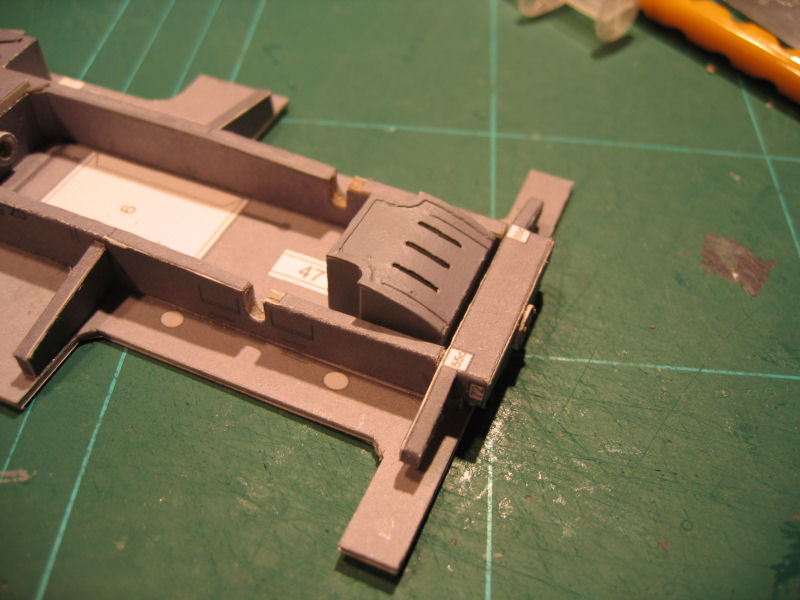
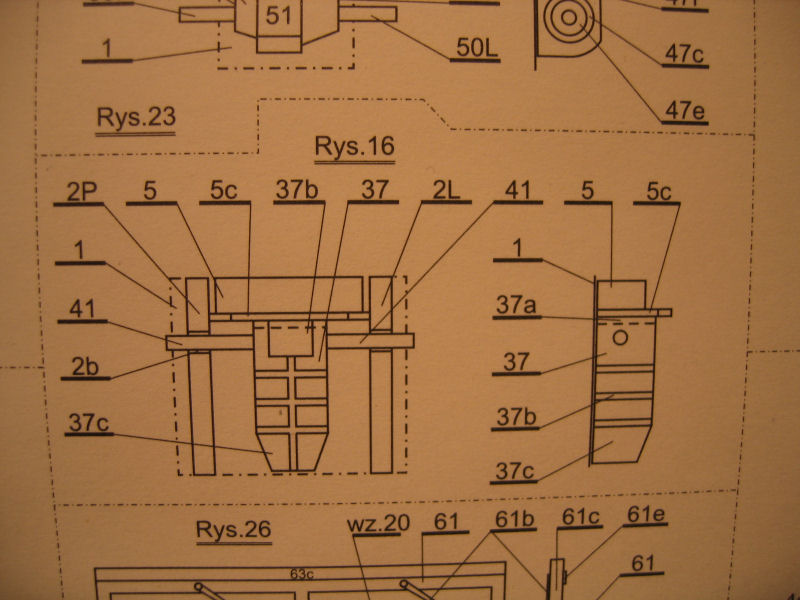
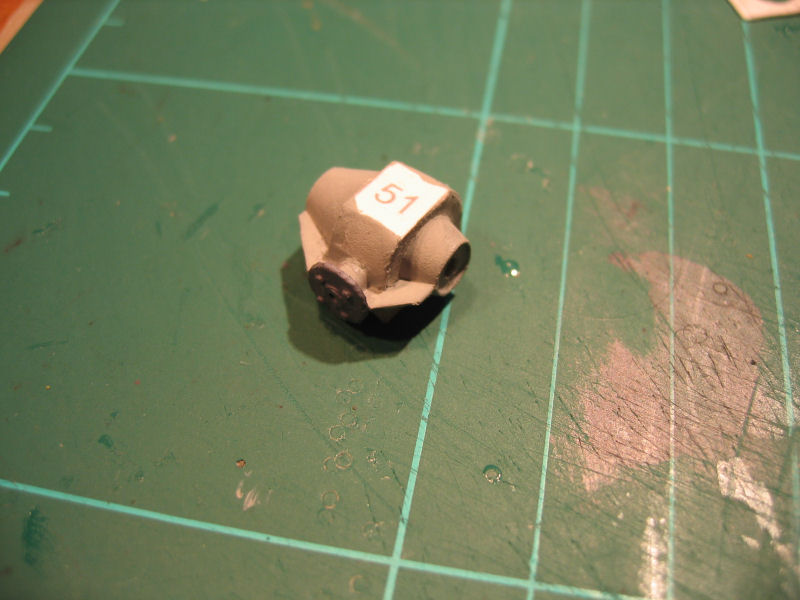
The front transmission
| As we can see from the drawing is this part 37 to be connected to the steeringbox. |
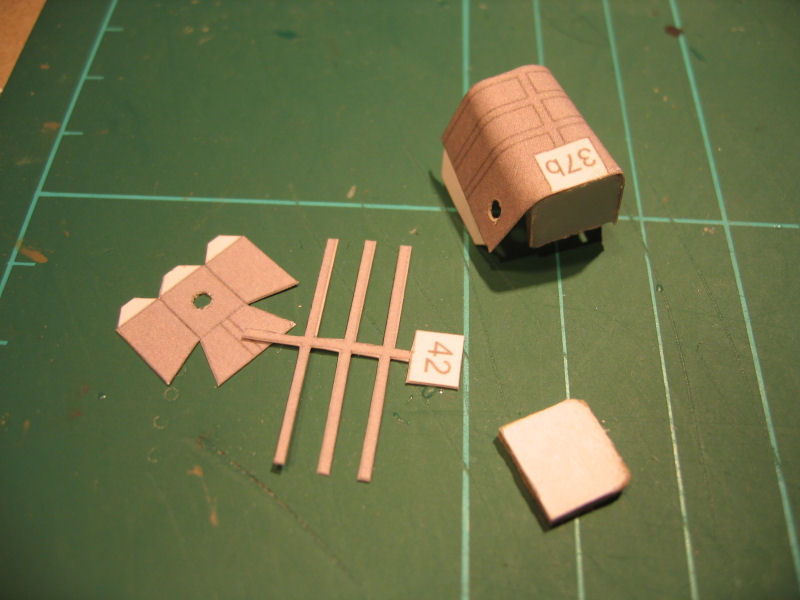
The part is built up of part 37, 37a 37b and 37c.Where 37a is glued to 1mm karton and makes the shape of the part. |
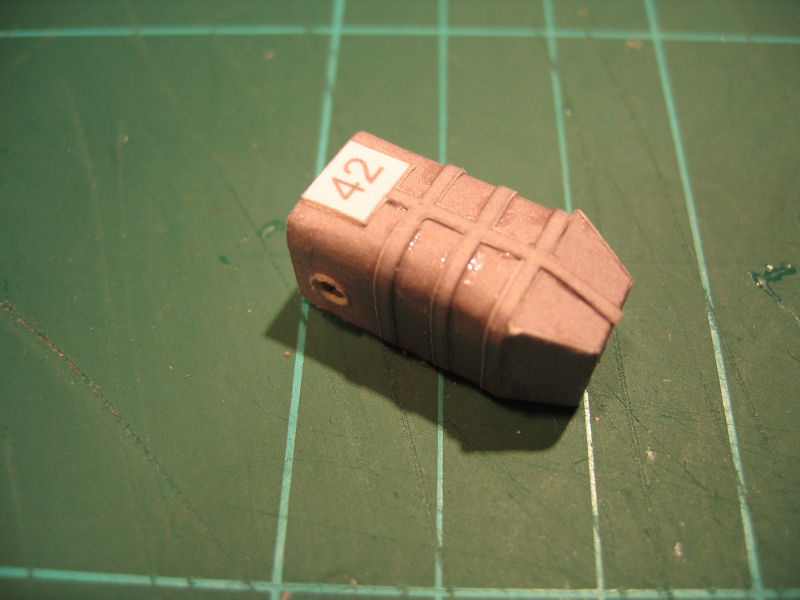
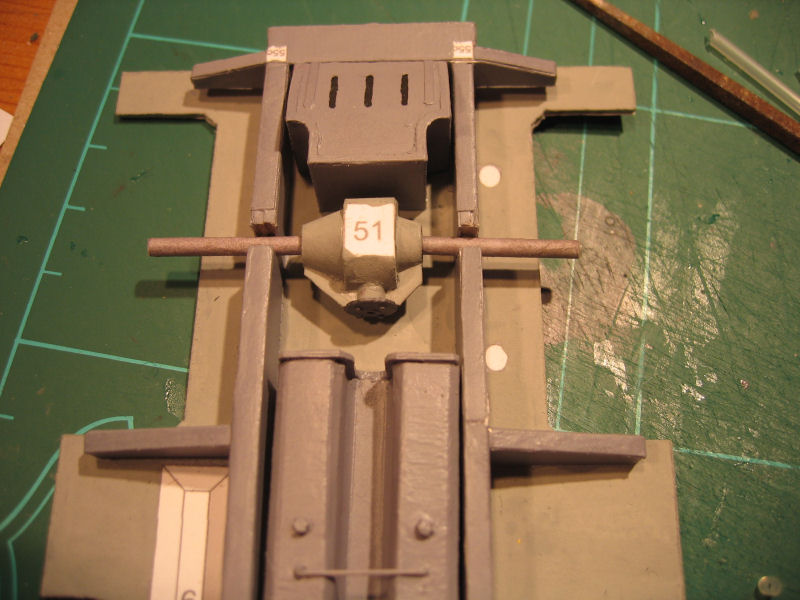
Mounted together with 2mm holes in front and in the sides for axels to be mounted |
And put in place.Axels is part 41 and is thin paper rolled on a 2mm base. |
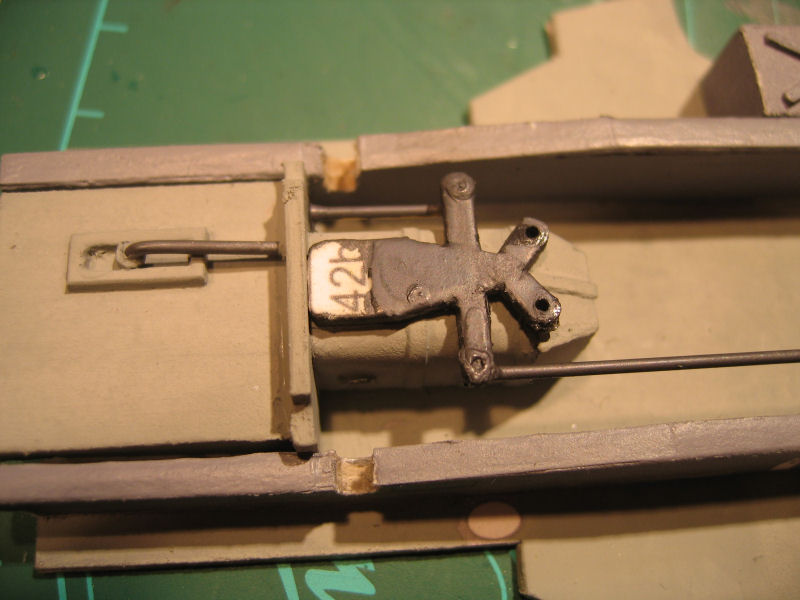
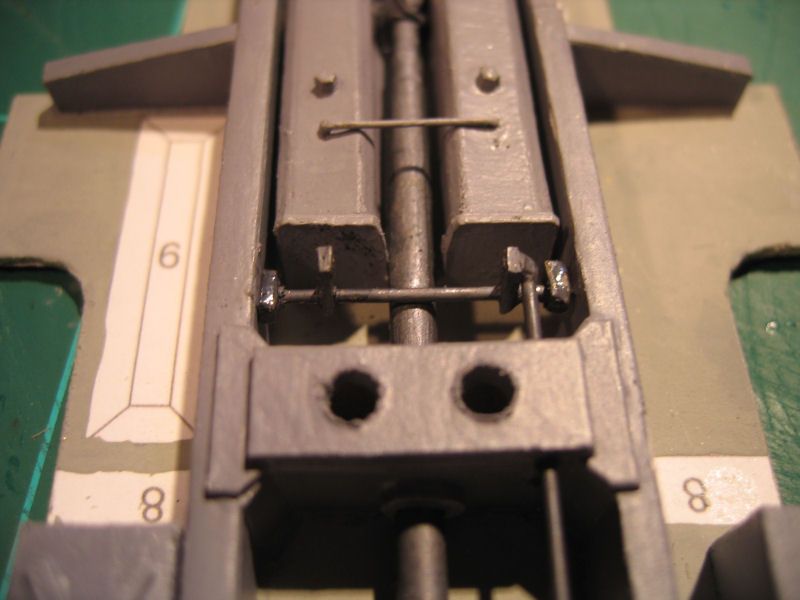
I might have found a solution on the steering rods.I decided to try to make them as close to the real Horch I could, within the limitations of the model.
First I cut out the front steering and painted it and glued it into place, then I put on the main steering rod that comes from the steeringbox.The first error discovered was here.....as we can see on the pic the rods are not aligned.This could easyly be fixed if it's discovered in advance and the position of the rod on the steeringbox could be moved a bit to the right.
| The misalignment. |
I also had to make some kind of transmission of the front rod over to the rear one.I drilled a hole in the centerbox as it is on the real pics I have and let the front rod go through there into the transmission. |
The rear rod is to be connected later when the fueltank and rear kardan is mounted. |
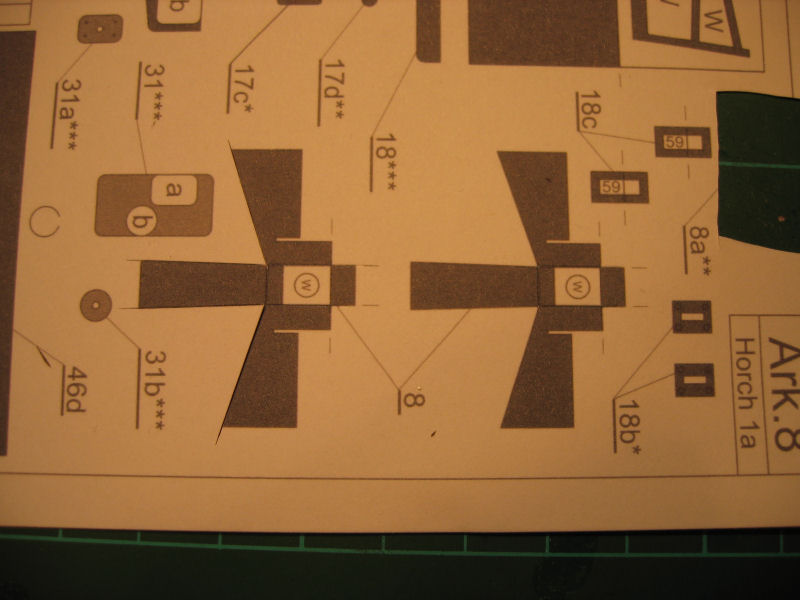
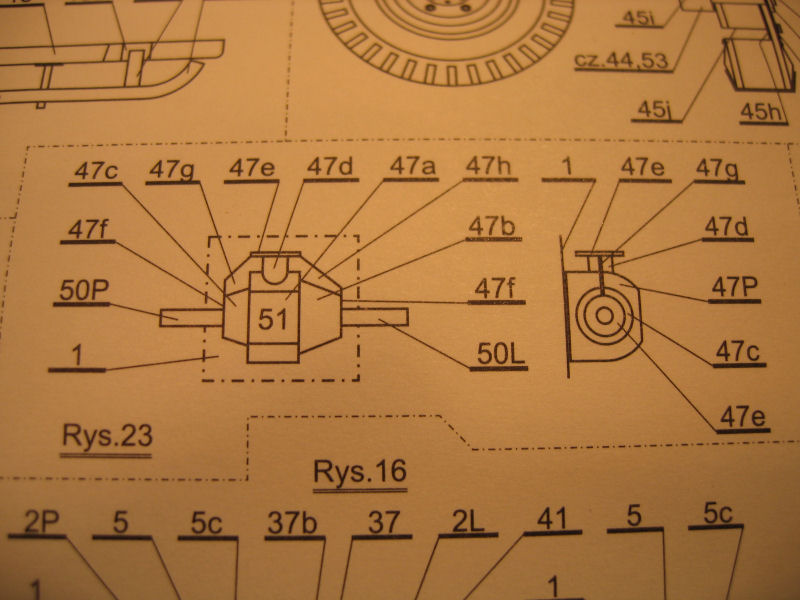
Drawing of the kardan. |
| The only small parts here are the ones used to make the link between the parts 38 and 39 and makes the "kross" on the kardan.Paint used are Humbrol 27003 polished steel colour. |
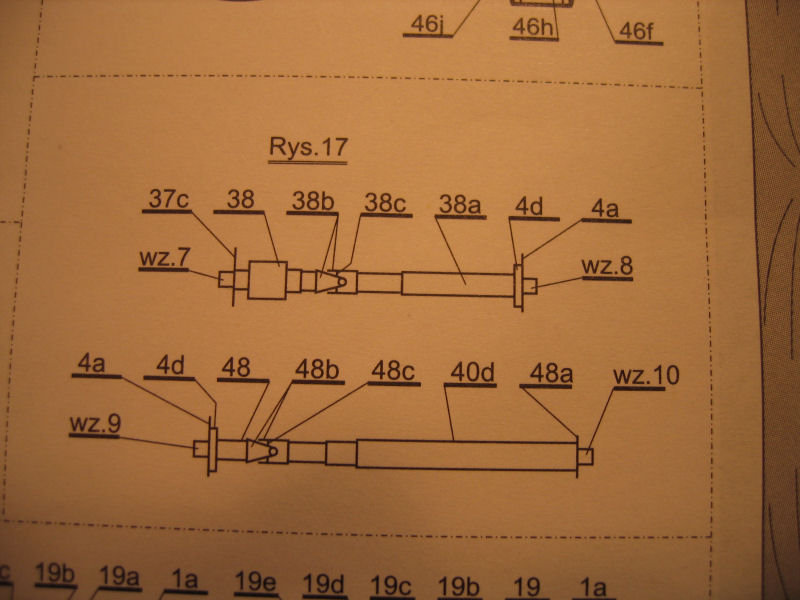
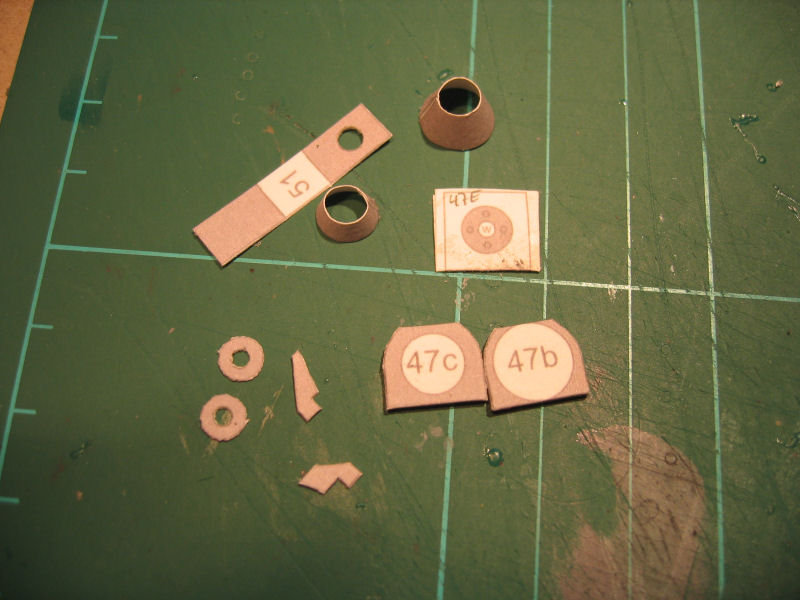
The rear transmission are made of several small parts. The Drawing. |
Parts cutted out and ready for assembly |
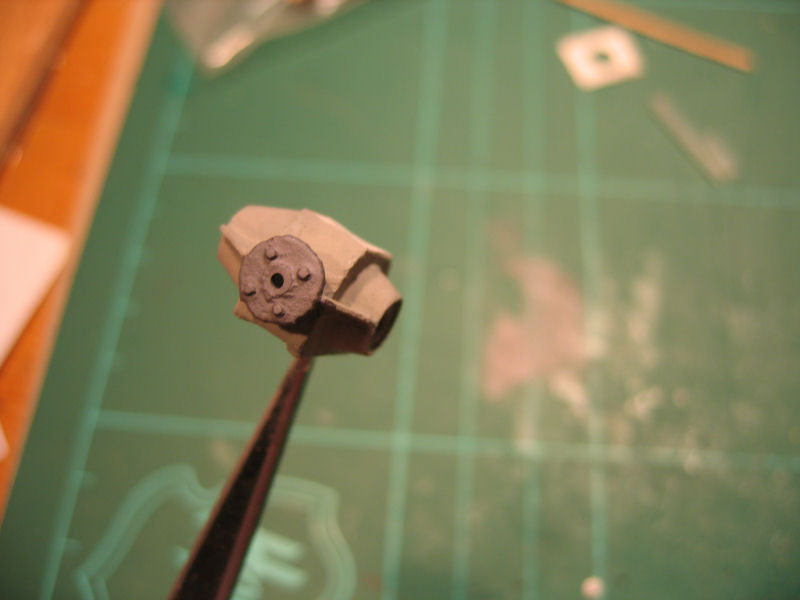
All parts fitted well and the part is ready for some paint |
| Painted. |
Another view of the part. |
And put into place |
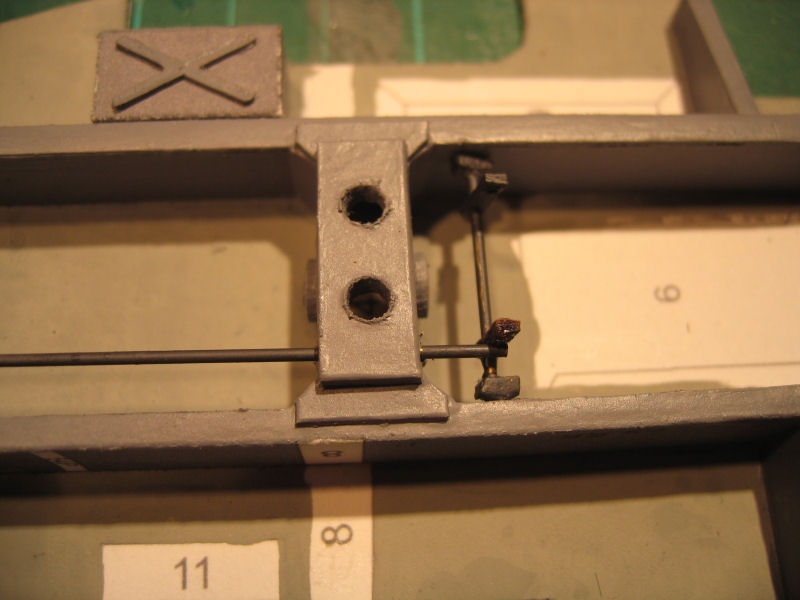
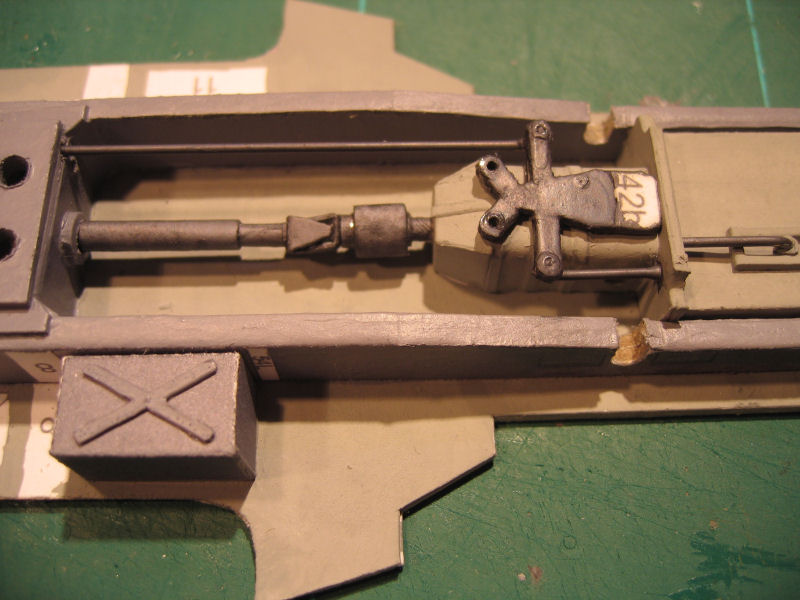
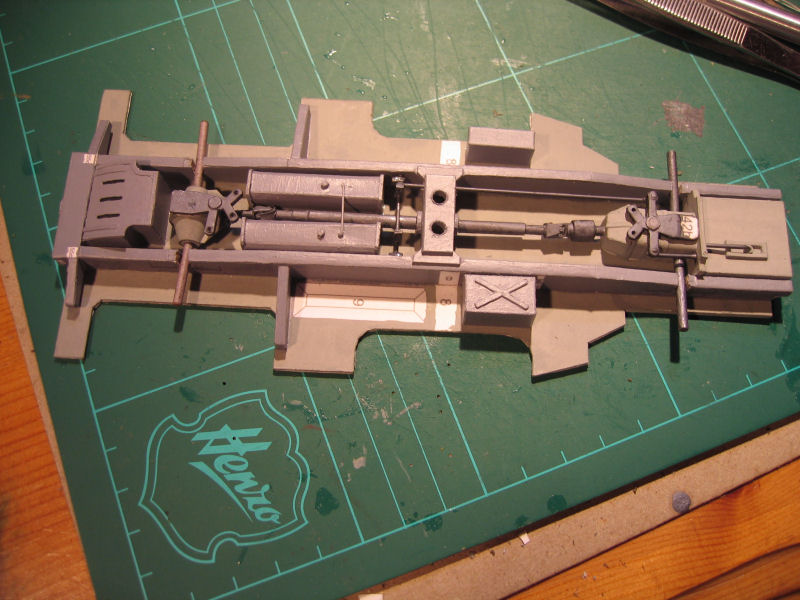
Rear transmission,rear axel,rear steeringrod and the steering transmission finished.
Rear axel,gaz tank and the rear steeringpad are in place |
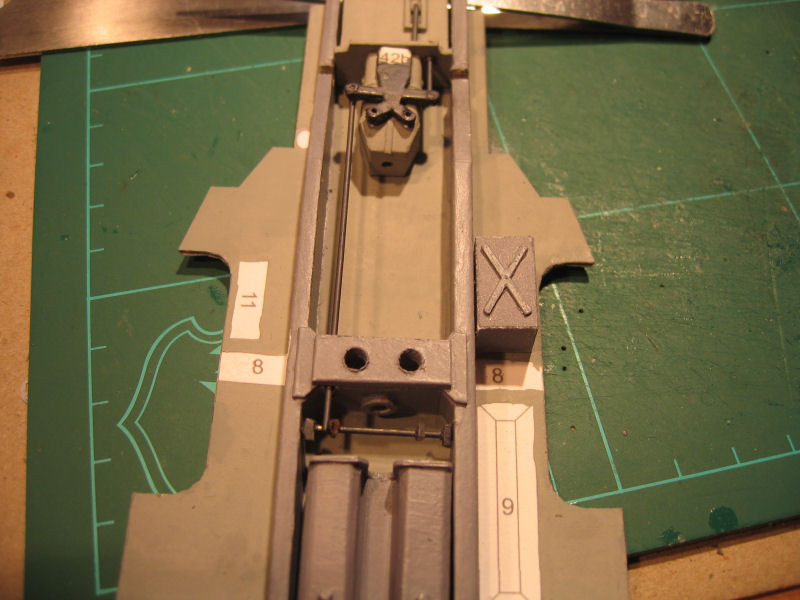
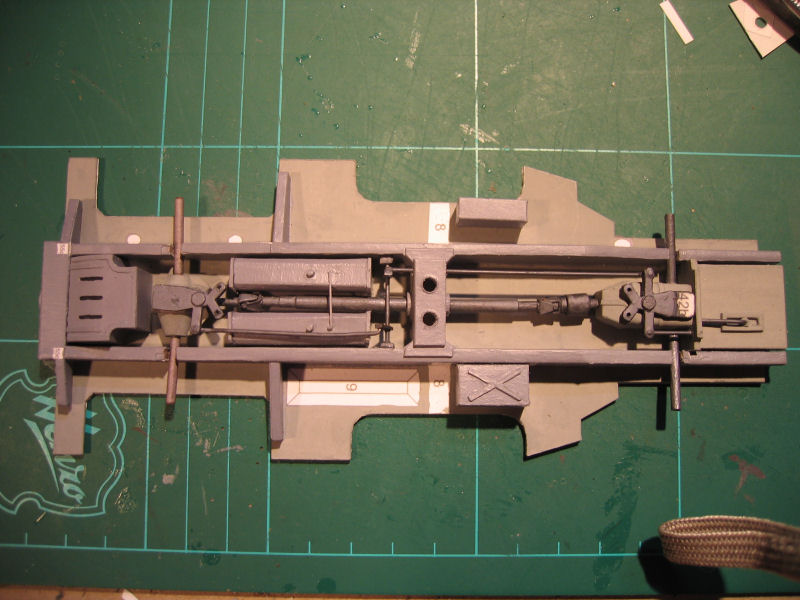
| An overview of the build so far. |
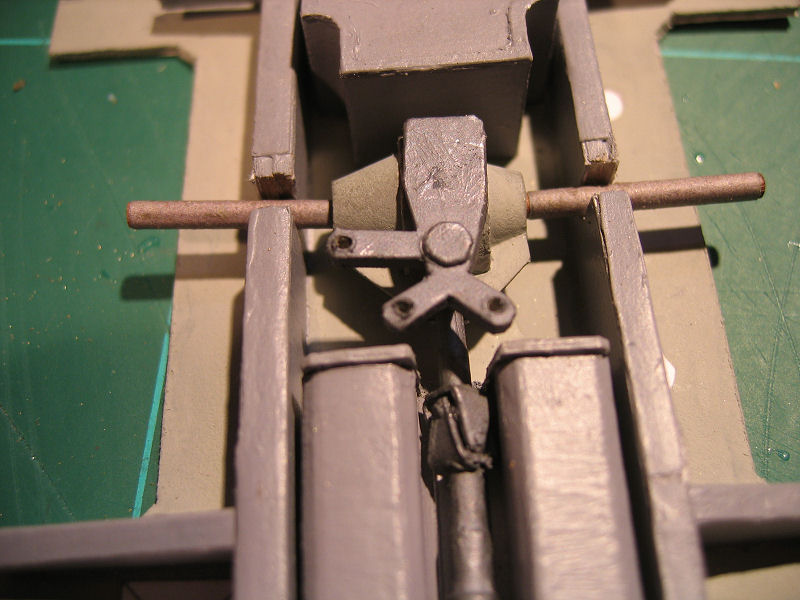
Closeup of the steering transmission. |
Closeup of the rear transmission |
Overview of the finished axels transmission and steering |
Gallery of the finished model is HERE
ˋJohnny Svensson 2007
|